You can improve your car’s appearance easily by replacing your Chevrolet Cruze emblem. You will not spend much money. This is helpful if your badge is faded or damaged. It is also useful if you want a cleaner look. This guide will show you the full process. You will learn how to remove the bumper cover. You will learn how to install the new emblem. You will also learn how to put everything back together.
Replace the Chevrolet Cruze Emblem Step by Step
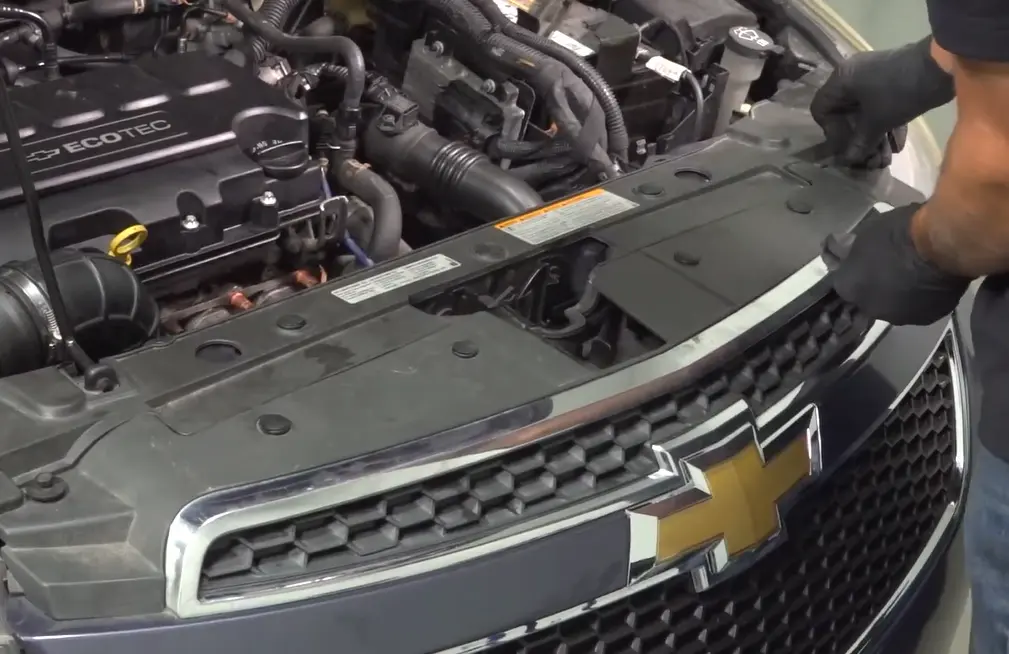
Remove the Bumper Cover
You should remove the front bumper cover before you can reach the emblem. This may sound difficult. It is actually simple with basic tools. You should also work slowly and carefully.
Top Fasteners
You can start at the top of the grille area and use a trim removal tool to lift the center of each push pin. This unlocks the pins so you can remove them easily. Then remove all of the push pins. You can use a 10mm socket to remove the bolts on both sides of the grille next. You should keep all hardware in a safe place. This will make reassembly easier later.
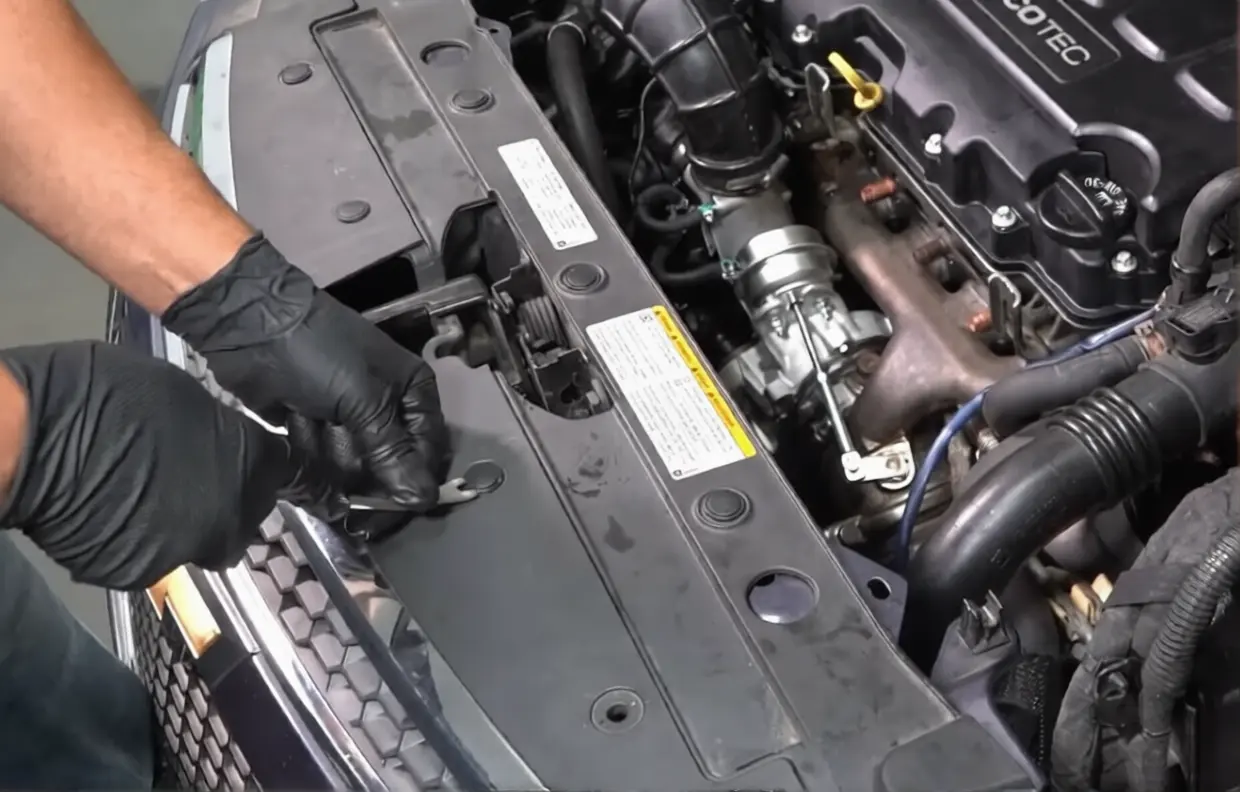
Bottom and Side Fasteners
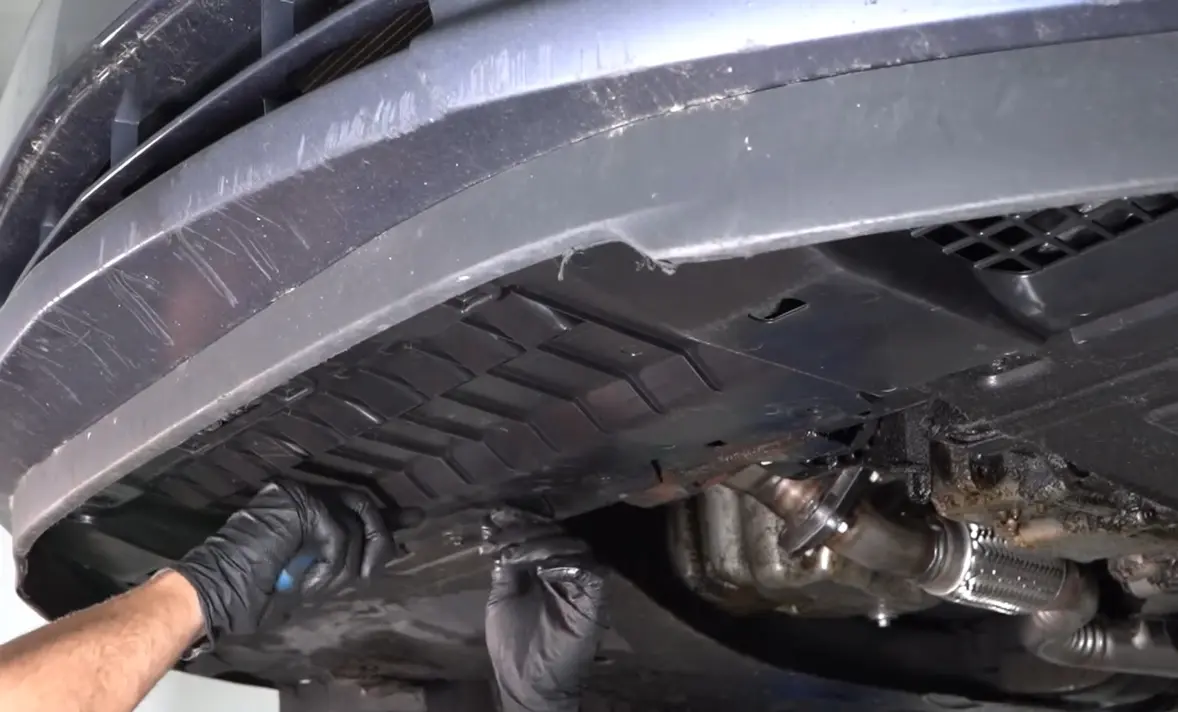
Next, move underneath the vehicle. Remove the push pins that secure the lower panel. Use a T20 socket. Remove the screws that hold the panel in place and remove the panel when all fasteners are out.
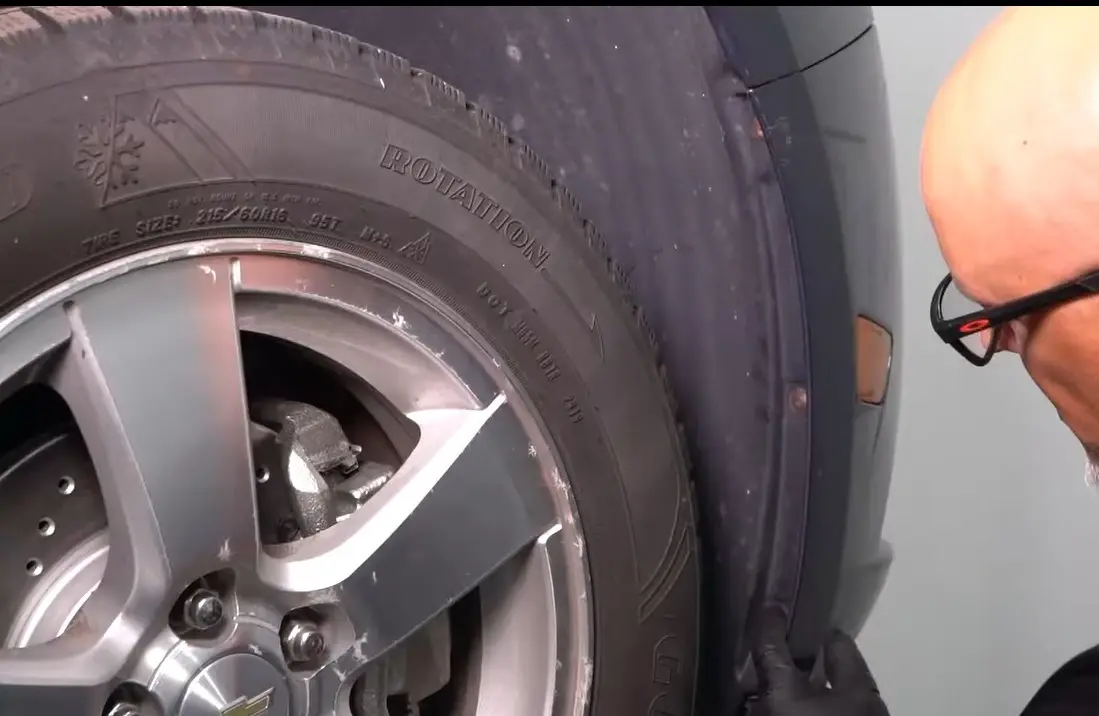
Move to each side of the car. Locate the inner fender wells. Remove the three T20 screws on each side. Remove the screws carefully which hold the bumper edges in place. Do not skip this step.
Electrical Disconnection
Now gently peel back the inner fender liner. This will give you access to the side marker light connector. Disconnect the connector carefully. Do not pull on the wires. This prevents damage.
If your Cruze has fog lights, unplug those connectors as well. Pull from the connector only. Do not pull on the wires.
Bumper Removal
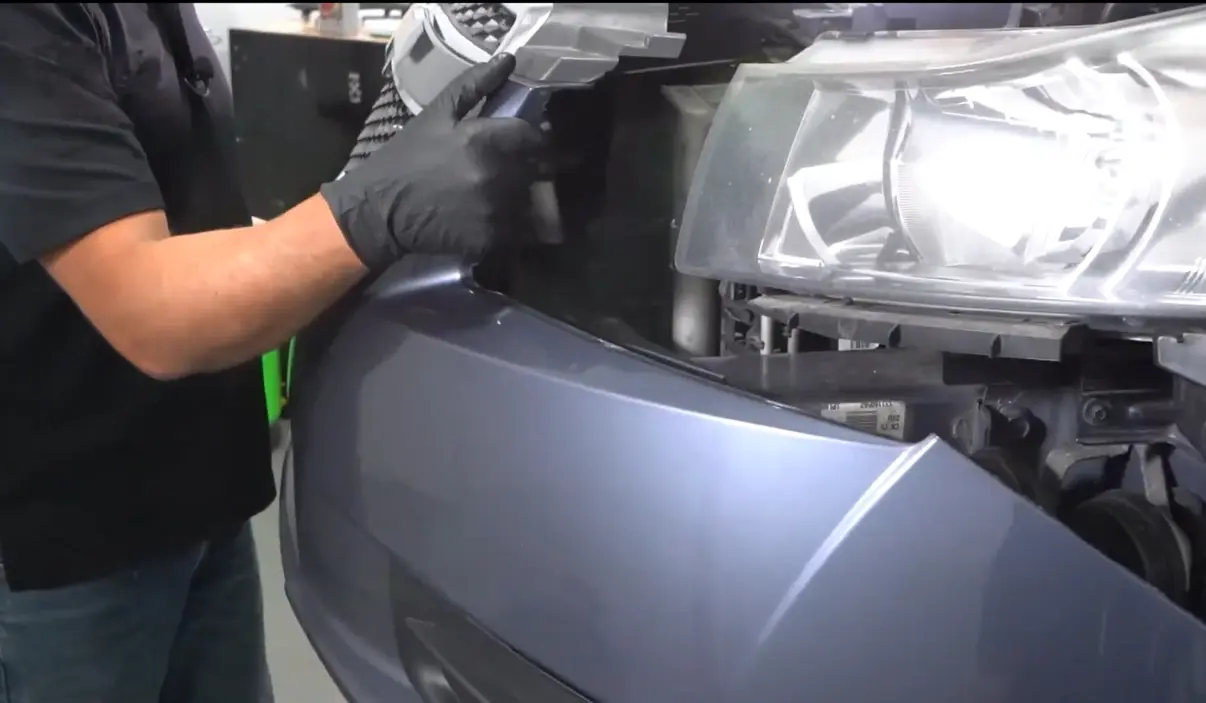
Now remove all fasteners and connections. Pull outward on the sides of the bumper cover. This will release the clips. Use firm but controlled force.
Once the sides are free, slide the bumper cover forward. Remove it completely from the car. Place the bumper cover on a soft surface. This will prevent scratches.
Replacing the Emblem
You can access the emblem more easily after the bumper is removed.
Removing the Old Chevrolet Cruze Emblem
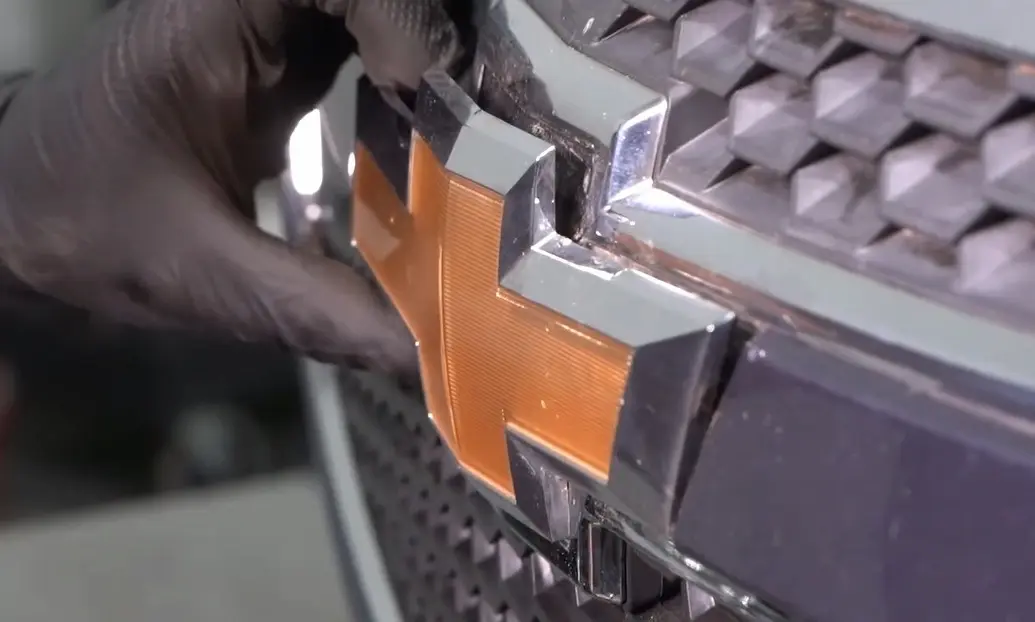
The factory emblem is held by clips and glue. Use a heat gun to warm the glue. Move the heat gun so you do not melt the grille.
Go to the back of the grille. Use a screwdriver or trim tool to unclip the tabs. Push the emblem out from the front when it is loose.
Preparing the Surface
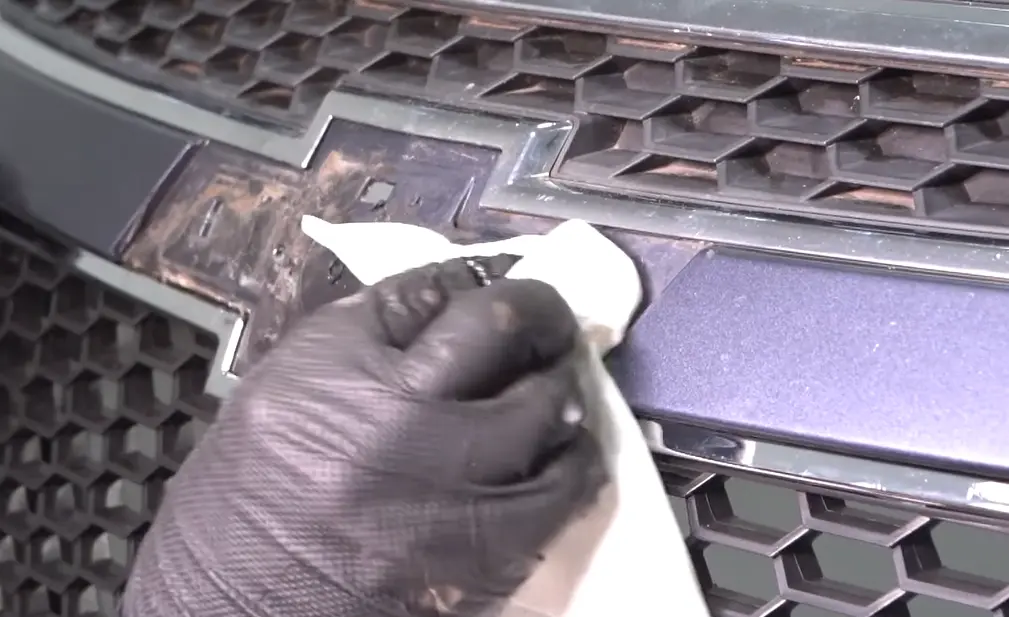
You may still find some glue on the surface after you remove the emblem. It is normal. You can use adhesive remover and a clean cloth to remove it and wipe the area well.
This step is important. Old glue can stop the new emblem from sticking properly.
Installing the New Chevrolet Cruze Emblem
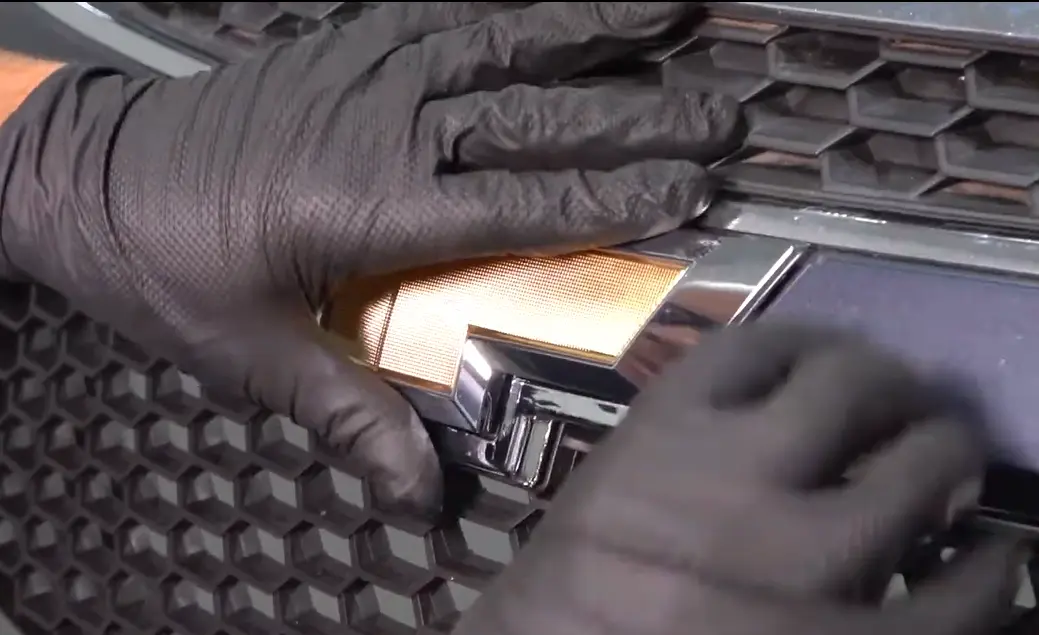
You can remove the backing from the double-sided tape on your new emblem. Then you check for the alignment arrow and use it to position the emblem correctly.
You press the emblem firmly into place. You make sure the clips snap securely into the grille and keep pressing for a few seconds so the adhesive sticks well.
Reassembling the Vehicle
Now that you installed the emblem, it is time to put everything back together.
Bumper Alignment
Carefully lift the bumper cover. Slide it back onto the vehicle. Align it with the mounting points.
Gently push it into place. Snap the sides back into their clips and make sure the bumper sits flush with the fenders.
Securing Fasteners
Reinstall the T20 screws in the fender wells first. This helps keep the bumper aligned properly.
Then Reconnect the side marker lights and fog lights before moving on. You may forget this step easily, but it is important for safety.
Final Steps
You should slide the lower panel back into position and secure it with the push pins and T20 screws..
Reinstall the top bolts using your 10mm socket. Replace the push pins in the grille area. Check all fasteners and connections before you finish.
Tips for a Successful Installation of Chevrolet Cruze emblem
- Work in a well-lit area to avoid missing screws or clips
- Keep all hardware organized during removal
- Avoid overheating the grille when using a heat gun
- Test all lights before completing reassembly
If you want to upgrade your emblem to the LED, you can check our light up Chevrolet emblem.
Conclusion
You can change the front emblem on a 2011–2015 Chevrolet Cruze by yourself easily. It is a good project for beginners. It can also save you money on repairs. You need only a few basic tools. You can work slowly and follow the instructions step by step. Most people can finish it in under two hours.
A new emblem improves the look of your car. You can also get a sense of accomplishment during the process. When you finish the work, your Cruze will look cleaner and newer.