
The Cadillac Escalade is a luxury SUV known for its bold styling and advanced features. One of the most popular upgrades for owners is the Escalade light up emblem installation. This modification not only adds a modern touch but also enhances the premium look of the vehicle, especially at night when the illuminated badge comes to life with a sleek animation.
If you’ve been thinking about upgrading your Escalade with a light up emblem, this detailed guide walks you through the entire installation process. From removing the original badge to wiring it into the fuse box, every step is explained clearly so you can achieve professional results at home.
Tools You’ll Need:
-
Nose pliers (for removing the fuse)
-
Small flat-head screwdriver
-
Trim tool remover (preferably plastic)
-
Socket wrench (for removing bolts when grounding the cable)
Steps by step for Escalade Light Up Emblem Installation:
Step 1: Remove the Plastic Panel
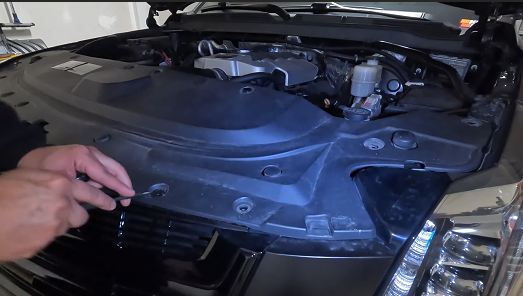
The first step is removing the large plastic panel under the hood. It’s held in place by 14 clips. Use a small flat-head screwdriver to gently pry each clip up, then pull it out. Once all clips are removed, the panel should lift right out.
Step 2: Remove the Factory Badge
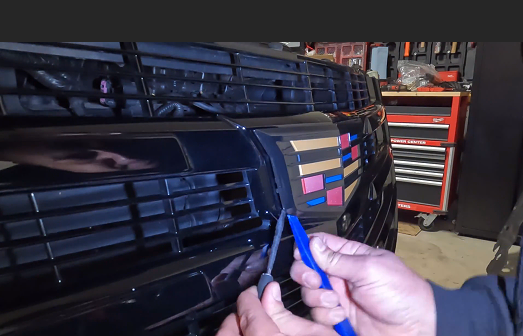
Next, it’s time to swap out the stock badge. Insert your flat-head screwdriver into a corner of the emblem and carefully lift it just enough to slide in your plastic trim tool. Work the tool around the edges and pull with your fingers. The badge is secured by plastic clips, so take your time.
-
If you don’t plan to reuse the badge, breaking a clip isn’t a big deal.
-
If you do want to reuse it, pry gently to avoid damage.
Step 3: Put the Escalade Light Up Emblem&Tuck in the Wiring
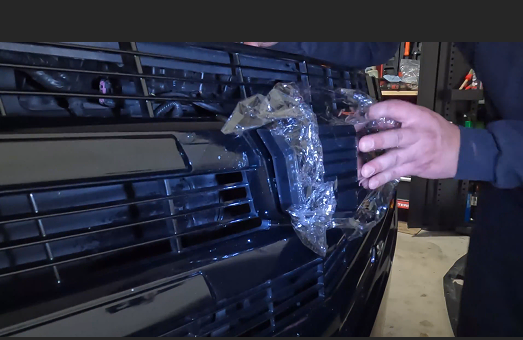
Put the escalade light up emblem which you bought from our store here:https://www.ledcaremblem.com/category/light-up-cadillac-emblem/ , Pls keep the film attached on the goods to prevent the damage during installation.
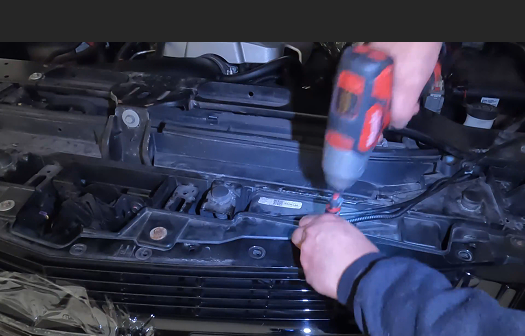
To keep things looking clean, I removed three 10mm bolts to tuck the wiring neatly under the panel. This isn’t mandatory, but it definitely gives a more professional finish.
Run the emblem wiring through the small hole on the right side of the washer tank. Pull it all the way through and route it toward the fuse box. Once done, reinstall the bolts if you removed them.
Step 4: Connect to the Fuse Box

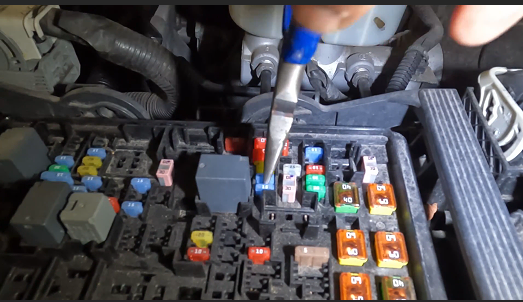

Open the fuse box by pressing the two tabs and lifting the lid. Locate fuses #42 or #43. I used fuse #43 for my install. Use nose pliers to remove the fuse, insert your new fuse tap, and make sure it’s seated firmly.
Step 5: Ground the Wiring
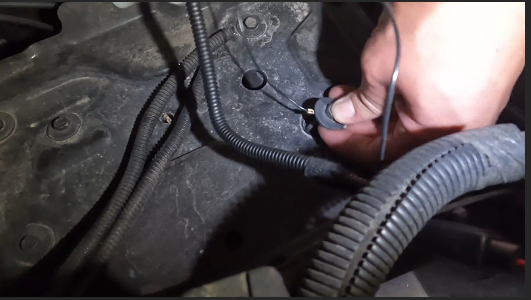
For the ground connection, use one of the bolts on the secondary battery tray. Attach your negative wire here and tighten it down securely.
Step 6: Modify Fuse Box Lid (Optional)

When closing the fuse box lid, you may notice the wires getting pinched. To fix this, I used a razor blade to cut a small notch where the wires pass through. This prevents damage and allows the lid to close flush.
Step 7: Reassemble Everything
Reinstall the large plastic cover and secure it with all 14 clips. Once everything is back in place, your light-up emblem is ready to shine.
Conclusion
The Escalade light up emblem installation is a rewarding DIY upgrade that enhances the SUV’s luxurious style. With just a few tools—a screwdriver, trim tool, pliers, and socket wrench—you can transform your Escalade’s front end with a striking illuminated badge.
Whether you’re going for a clean blacked-out look or want to showcase Cadillac’s signature animation, this installation delivers impressive results. Once complete, every time you unlock your vehicle, you’ll be greeted by a glowing emblem that reflects both sophistication and style.